Setting Up Your Home Network: Step-by-Step Guide
Visits: 696
Creating a home network might seem complicated, but with the right guidance, it can be a smooth and straightforward process. This extensive guide will walk you through each step, ensuring that you can set up your network efficiently and securely. Whether you want to connect multiple devices to the internet, share files, or stream content seamlessly, we've got you covered.
1. Understand Your Needs
Before diving into the setup, it's essential to understand your requirements. Ask yourself:
- How many devices will be connected?
- What type of internet connection do you have (DSL, cable, fiber)?
- Do you need wired or wireless connections?
- Are there any specific areas in your home where the internet signal needs to be strong?
Table 1: Home Network Requirements
| Requirement | Details |
|---|---|
| Number of Devices | Smartphones, laptops, tablets, smart TVs, etc. |
| Internet Connection | DSL, cable, fiber |
| Connection Type | Wired (Ethernet) or Wireless (Wi-Fi) |
| Coverage Area | Size of your home and critical areas for signal strength |
Identifying Devices and Usage
Consider the types of devices you will be connecting. Common devices include smartphones, laptops, tablets, smart TVs, gaming consoles, smart home devices, and desktop computers. Understanding the usage of each device will help you prioritize network traffic and optimize your setup.
Internet Connection Type
Your internet connection type (DSL, cable, fiber) will influence the kind of modem and router you need. Fiber connections usually offer higher speeds but might require specific equipment provided by your ISP.
2. Gather Necessary Equipment
Here's a list of equipment you'll need to set up your home network:
- Modem: Connects your home to the internet service provider (ISP).
- Router: Distributes the internet connection to various devices.
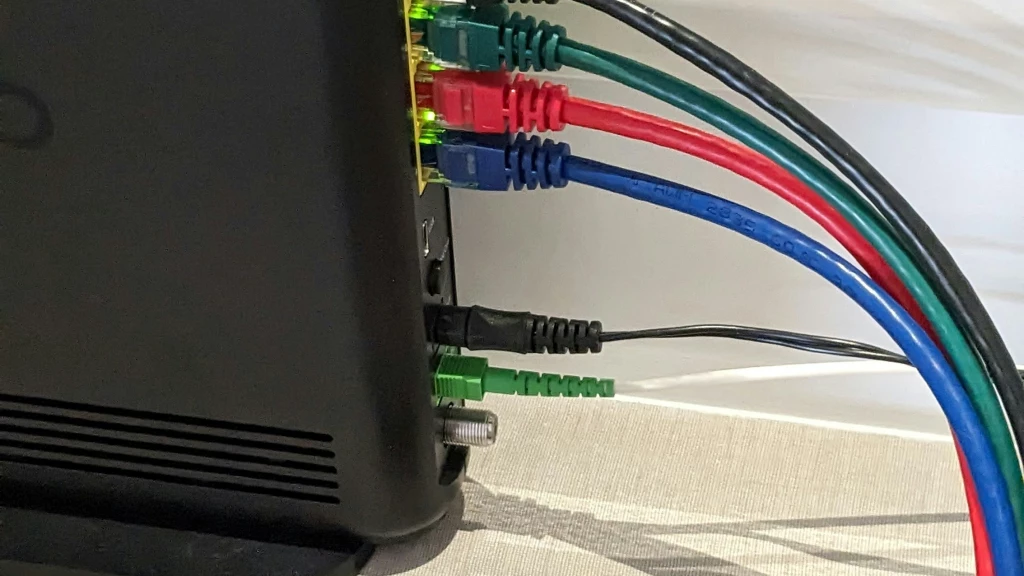
- Ethernet Cables: For wired connections.
- Network Switch: Optional, for additional wired connections.
- Wi-Fi Extenders: Optional, for improving wireless coverage in large homes.
Table 2: Home Network Equipment
| Equipment | Purpose |
|---|---|
| Modem | Connects to the ISP |
| Router | Distributes internet to devices |
| Ethernet Cables | Provides wired connections |
| Network Switch | Adds more wired connection ports (optional) |
| Wi-Fi Extenders | Boosts Wi-Fi signal in large homes (optional) |
Choosing the Right Router
When selecting a router, consider the following factors:
- Speed: Look for routers that support the maximum speed offered by your ISP.
- Coverage: Ensure the router can cover the size of your home. Larger homes may benefit from mesh Wi-Fi systems.
- Features: Some routers offer advanced features like parental controls, guest networks, and Quality of Service (QoS) settings.
- Compatibility: Ensure the router is compatible with your modem and ISP.
3. Set Up the Modem
- Connect the Modem: Plug the modem into a power source and connect it to the wall jack using a coaxial cable (for cable internet) or a phone line (for DSL).
- Activate the Modem: Follow the ISP's instructions to activate the modem. This usually involves connecting a computer to the modem and visiting the ISP's activation page.
Table 3: Modem Setup Steps
| Step | Action |
|---|---|
| Connect Modem | Plug into power and connect to wall jack |
| Activate Modem | Follow ISP instructions to activate |
Troubleshooting Modem Issues
If you encounter issues during modem setup:
- Check Connections: Ensure all cables are securely connected.
- Reboot: Unplug the modem, wait 30 seconds, and plug it back in.
- ISP Support: Contact your ISP for additional troubleshooting steps.
4. Set Up the Router
- Connect the Router to the Modem: Use an Ethernet cable to connect the modem to the router's WAN (Wide Area Network) port.
- Power Up the Router: Plug the router into a power source.
- Configure the Router: Connect a computer to the router using another Ethernet cable. Access the router's settings by typing the router's IP address into a web browser (usually 192.168.0.1 or 192.168.1.1). Follow the on-screen instructions to set up your network name (SSID) and password.
Table 4: Router Setup Steps
| Step | Action |
|---|---|
| Connect to Modem | Use Ethernet cable to connect router to modem |
| Power Up Router | Plug into power source |
| Configure Router | Access settings via web browser and set up SSID and password |
Setting Up Wi-Fi Network
During the router configuration, you'll need to set up your Wi-Fi network:
- SSID: Choose a unique and easy-to-remember network name.
- Password: Use a strong password with a mix of letters, numbers, and symbols.
- Security: Select WPA3 for the highest level of security.
Advanced Router Settings
For more advanced configurations:
- Guest Network: Set up a separate network for guests to keep your main network secure.
- Parental Controls: Configure settings to restrict internet access for certain devices or at specific times.
- Quality of Service (QoS): Prioritize bandwidth for critical applications like video streaming or online gaming.
5. Connect Devices to the Network
For Wired Connections:
- Plug in the Ethernet Cable: Connect one end of the Ethernet cable to the device and the other end to the router or network switch.
- Check Connection: Ensure the device recognizes the network connection.
Table 5: Wired Connection Setup
| Step | Action |
|---|---|
| Connect Ethernet Cable | Plug one end into device, other end into router/switch |
| Verify Connection | Check device network settings for connection status |
For Wireless Connections:
- Locate the Network: On your device, go to the Wi-Fi settings and look for your network name (SSID).
- Enter the Password: Select your network and enter the password you set during the router configuration.
- Connect: Once the device connects, you should have internet access.
Table 6: Wireless Connection Setup
| Step | Action |
|---|---|
| Locate Network | Find your SSID in device's Wi-Fi settings |
| Enter Password | Input the password set during router configuration |
| Confirm Connection | Ensure device shows connected status |
Troubleshooting Device Connections
If you encounter issues connecting devices:
- Restart Device: Reboot the device and try reconnecting.
- Check Password: Ensure you are entering the correct Wi-Fi password.
- Router Settings: Verify that the router is not limiting connections or has reached its device limit.
6. Optimize Your Network
Improve Wi-Fi Coverage
- Place Router Centrally: Position your router in a central location to maximize coverage.
- Reduce Interference: Keep the router away from walls, metal objects, and other electronics.
- Use Wi-Fi Extenders: Place Wi-Fi extenders in areas with weak signals to boost coverage.
Table 7: Improving Wi-Fi Coverage
| Tip | Details |
|---|---|
| Central Placement | Position router in a central location |
| Minimize Interference | Avoid placing near walls, metal objects, electronics |
| Wi-Fi Extenders | Use extenders to boost signal in weak areas |
Secure Your Network
- Change Default Settings: Modify the default SSID and password to something unique.
- Enable Encryption: Use WPA3 encryption for the best security.
- Update Firmware: Regularly check for and install updates for your router's firmware.
Table 8: Network Security Tips
| Security Measure | Details |
|---|---|
| Change Default Settings | Update SSID and password from defaults |
| Use WPA3 Encryption | Select WPA3 in router settings for optimal security |
| Update Firmware | Regularly check for and apply firmware updates |
Advanced Network Management
For those who want to take their network management a step further:
- Network Monitoring: Use network monitoring tools to track bandwidth usage and identify potential issues.
- VPN Setup: Configure a VPN (Virtual Private Network) on your router for enhanced privacy and security.
- Static IP Addresses: Assign static IP addresses to critical devices for better network management.
Table 9: Advanced Network Management
| Advanced Feature | Purpose |
|---|---|
| Network Monitoring | Track usage, identify issues |
| VPN Setup | Enhance privacy and security |
| Static IP Addresses | Better manage and identify critical devices |
7. Expand Your Network
As your network needs grow, you may want to expand your setup:
Adding More Devices
- Network Switch: If you need more wired connections, add a network switch to increase the number of available ports.
- Mesh Wi-Fi System: For larger homes or better coverage, consider a mesh Wi-Fi system that uses multiple nodes to provide seamless connectivity.
Table 10: Expanding Your Network
| Expansion Option | Purpose |
|---|---|
| Network Switch | Increase number of wired connection ports |
| Mesh Wi-Fi System | Provide seamless coverage in larger homes |
Smart Home Integration
Integrate smart home devices to enhance your living experience:
- Smart Thermostats: Control your home's temperature remotely.
- Smart Lights: Adjust lighting with your voice or a mobile app.
- Security Cameras: Monitor your home from anywhere.
Table 11: Smart Home Devices
| Device Type | Function |
|---|---|
| Smart Thermostats | Remote temperature control |
| Smart Lights | Voice/app controlled lighting |
| Security Cameras | Home monitoring from anywhere |
Conclusion
Setting up a home network involves several steps, but with this comprehensive guide, you can do it efficiently. Remember to secure your network to protect your personal information and enjoy the benefits of a well-connected home.
If you have any questions or need further assistance, visit 2ip.ca for more information and helpful resources. Happy networking!
- All Categories
- Basics of the Internet 21
- Internet Security and Privacy 18
- VPN and Protection Tools 23
- Optimizing Internet Performance 15
- Device and Software Management 17
- Wi-Fi and Home Networks 15
- Data backup 16
- Social Media and Security 16
- Cloud Technologies and Storage 18
- Internet of Things (IoT) Devices 14
- Linux 16
- Mobile security 15
- Setting up home networks 14
- Digital Legacy 14
- IT Education 15
- Cyber threats 17
- File sharing and security 15
- The future of technology 14