How to Choose and Install an SSD for Your Computer
Visits: 584
Upgrading your computer can seem overwhelming, especially if you're not a tech expert. However, installing a Solid State Drive (SSD) is one of the easiest and most impactful upgrades you can do. With faster loading times, better performance, and longer battery life for laptops, SSDs can give your computer a new lease on life. In this article, we'll go step by step to help you choose the right SSD and install it without hassle. We will keep things simple so that everyone, even those new to tech, can understand. Let's get started!
Why Choose an SSD?
Before diving into choosing and installing an SSD, let's understand why an SSD can make such a difference to your computer.
| Feature | HDD (Hard Disk Drive) | SSD (Solid State Drive) |
|---|---|---|
| Speed | Slow | Much faster |
| Durability | Easily damaged by bumps | Resistant to shock |
| Noise | Noisy | Silent |
| Power Consumption | Higher | Lower |
An SSD replaces the mechanical spinning parts found in traditional hard drives (HDDs) with faster flash memory. This makes your computer start up much quicker and load applications almost instantly. Whether you're editing documents, browsing the web, or gaming, the speed difference is immediately noticeable. Unlike HDDs, SSDs have no moving parts, which means less wear and tear, making them a more reliable option over time.
Step 1: Choosing the Right SSD
There are different types of SSDs available, and you need to choose the right one for your computer. Here are the main factors to consider:
1. Size and Compatibility
- Form Factor: SSDs come in various physical shapes or "form factors." The most common ones are 2.5-inch and M.2.
- 2.5-inch SSD: Most desktop and many laptops use this. It looks similar to a traditional HDD and is often a straightforward swap.
- M.2 SSD: These are smaller and look like a stick of gum. They are often used in newer laptops and desktops and provide higher speeds.
- PCIe SSD: Sometimes, you might come across PCIe SSDs. These SSDs connect directly to your motherboard's PCIe slot, offering excellent speed but requiring specific compatibility.
| Form Factor | Best Use Case | Example Computers |
| 2.5-inch | Older PCs, Laptops | Desktop towers, standard laptops |
| M.2 | Newer Laptops, Desktops | Ultrabooks, modern PCs |
| PCIe | Gaming PCs, High Performance | Gaming desktops, high-end builds |
2. Capacity
- How Much Space Do You Need?: SSDs come in different sizes, from 120GB to over 2TB. Here’s a guide to help you decide:
- 256GB: Ideal for light users who mainly surf the web and use basic programs. This is a great choice for a secondary drive as well.
- 512GB - 1TB: Great for storing games, videos, and photos. This size works well for average users who want to store media and games without constantly managing their files.
- 2TB or More: If you have a lot of data, do video editing, or prefer to store lots of games and large files locally, a larger capacity is best.
| Capacity | Ideal For | Approximate Price (CAD) |
| 256GB | Casual browsing, light use | $40-$60 |
| 512GB | Average use, gaming | $60-$100 |
| 1TB+ | Heavy use, professionals | $120+ |
| 2TB+ | Content creation, video editing | $200+ |
It’s also worth noting that SSD prices have been dropping significantly in recent years, making it more affordable to get larger capacities. Consider future-proofing your storage needs by opting for a bit more capacity than you need today.
3. Connection Interface
- SATA vs. NVMe:
- SATA SSD: Uses the SATA connection, which is older but still good for an upgrade from an HDD. These drives are generally more affordable but offer slower speeds compared to newer interfaces.
- NVMe SSD: Faster than SATA, using the PCIe interface. These are ideal for those wanting maximum speed for activities like gaming, video editing, or running intensive applications. NVMe SSDs can make booting up your PC, launching applications, and loading games even faster.
| Connection Type | Speed (Read/Write) | Price |
| SATA | Up to 600MB/s | Affordable |
| NVMe | Up to 3500MB/s | More expensive |
| PCIe 4.0 NVMe | Up to 7000MB/s | Premium Price |
If your computer supports NVMe SSDs, it’s recommended to go for them, as the performance difference can be substantial compared to SATA SSDs.
Step 2: Preparing to Install the SSD
Once you have chosen the right SSD, it's time to get ready for installation.
1. Backup Your Data
Before doing anything, make sure to backup all your important files. Losing data can be devastating, so it’s always a good idea to be cautious. You can use an external drive or cloud services like Google Drive, Dropbox, or OneDrive. Having a recent backup ensures that even if something goes wrong during installation, your precious photos, documents, and other files will be safe.
| Backup Option | Type | Pros |
| External Drive | Hardware | Easy, accessible |
| Cloud Storage | Online Service | Accessible anywhere |
2. Gather the Tools
To install an SSD, you’ll need:
- A screwdriver (usually a small Philips head)
- Your new SSD
- A cloning kit or USB adapter (optional)
- An anti-static wrist strap (recommended to avoid static damage)
| Tool | Purpose |
| Screwdriver | To open your computer case |
| USB Adapter | For transferring data |
| Anti-Static Wrist Strap | To prevent electrostatic discharge damage |
An anti-static wrist strap isn't mandatory, but it helps protect the sensitive components of your computer from potential static electricity damage. It’s better to be safe, especially if you’re not used to handling computer parts.
Step 3: Installing the SSD
1. Open Your Computer
- Desktops: Unscrew the side panel to access the motherboard. Make sure to unplug the power before you start. Touch a metal part of your computer’s frame before starting to dissipate any static electricity.
- Laptops: Depending on your laptop model, you may need to unscrew the back cover to access the hard drive. Some laptops have dedicated slots for easy SSD upgrades, while others require you to remove the entire back panel.
2. Connect the SSD
- For 2.5-inch SSDs: Use a SATA cable to connect the SSD to your motherboard and a power cable from your power supply. This is similar to connecting a standard hard drive.
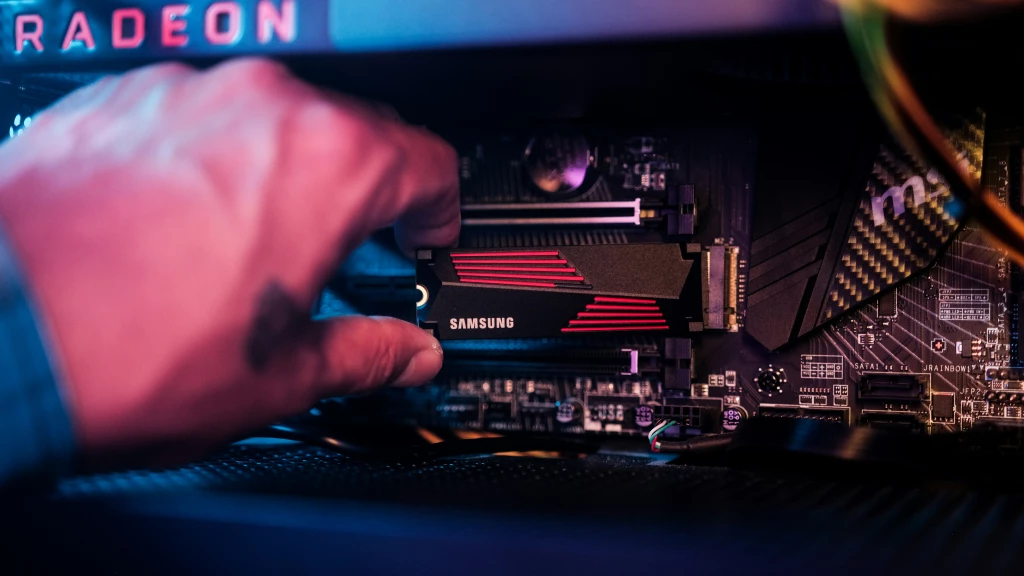
- For M.2 SSDs: Slot the M.2 SSD into the dedicated slot on your motherboard. It will usually be labeled "M.2" and is fairly easy to identify. Ensure it is pushed in at a 30-degree angle and then pressed down until it locks in place. You may need to use a small screw to secure it.
| Type of SSD | Installation Step |
| 2.5-inch | Connect via SATA cable |
| M.2 | Insert into M.2 slot directly |
| PCIe | Insert into PCIe slot, screw in |
3. Secure the SSD
Make sure the SSD is screwed in properly or seated securely in the slot. This will prevent it from coming loose during use. Loose connections could cause intermittent issues, which could be very frustrating to troubleshoot later on.
Step 4: Setting Up Your New SSD
Once the physical installation is complete, it’s time to set up your SSD.
1. Cloning Your Old Drive (Optional)
If you want your new SSD to have all your old files, including Windows, you can clone your old drive.
- Cloning Software: Use software like Macrium Reflect or Acronis True Image. This software helps you copy all of your files, settings, and even your operating system to the new SSD.
- How to Clone: Connect both drives to your computer and use the cloning software to copy everything from your old drive to your new SSD. This process may take some time depending on the size of your old drive and the connection speed.
| Software Name | Price | Features |
| Macrium Reflect | Free | Easy to use, basic clone |
| Acronis True Image | $50+ | More features, backups |
| EaseUS Todo Backup | $30 | User-friendly interface |
Cloning is useful if you want to avoid reinstalling Windows and all your applications, as it creates an exact copy of your old system. It is an easy way to get up and running without starting from scratch.
2. Install a Fresh Version of Windows
If you prefer to start fresh, you can install a clean version of Windows. A fresh install can help eliminate any clutter, unnecessary files, or even malware that may have accumulated on your old drive over time.
- Create a Bootable USB: Use a tool like Microsoft’s Media Creation Tool to create a USB drive that will install Windows. Make sure your USB drive has at least 8GB of free space.
- Installing Windows: Insert the USB drive, start your computer, and boot from the USB by accessing the boot menu. Follow the instructions to install Windows on your new SSD.
| Step | Details |
| Create Bootable USB | Use Media Creation Tool |
| Install Windows | Boot from USB and follow instructions |
A fresh install may take a bit more time upfront, but it can be well worth it to have a clean slate with no old files or errors carried over from your previous installation.
Step 5: Final Steps
1. Change Boot Order
Once installed, you may need to change the boot order to make sure your computer starts from the SSD. This is done in the BIOS, which you can access by pressing a key like F2, F10, or Delete while the computer starts up. Find the "Boot Order" section and move the SSD to the top of the list.
2. Test Your SSD
Once the installation is complete, check that everything is working.
- Speed Check: Use software like CrystalDiskMark to test the read and write speeds. This will help ensure your SSD is functioning properly and at the advertised speed.
- Space Management: Make sure your SSD shows up in "My Computer" or "This PC" with the correct capacity. Open Disk Management in Windows to initialize the drive if necessary.
| Test Type | Recommended Software | Purpose |
| Speed Test | CrystalDiskMark | Verify read/write speed |
| Disk Check | Windows Explorer | Check available space |
| Disk Management | Windows Utility | Initialize or partition |
Using Disk Management, you can also partition your drive if desired, which allows you to separate data into different areas of the SSD for better organization.
Conclusion
Upgrading your computer with an SSD can significantly improve its speed and overall performance. Whether you're booting up Windows, opening apps, or multitasking, SSDs make everything faster and smoother. While it might seem technical, with the right SSD, tools, and a little guidance, the process is quite straightforward.
Whether you decide to clone your old drive or start fresh with a clean install, the benefits of faster boot times, quieter operation, and smoother multitasking are worth it. Remember that you can always get additional help online, from forums or tech support, if you get stuck.
Take your time, follow the steps carefully, and enjoy the improvement that an SSD brings to your computing experience. If you ever feel unsure, don't hesitate to ask for help or consult a professional. The enhanced speed, reliability, and efficiency of an SSD upgrade make it one of the most valuable improvements you can make to any computer. With this guide, you’re now ready to give your system a significant boost and breathe new life into your trusty machine.
- All Categories
- Basics of the Internet 21
- Internet Security and Privacy 18
- VPN and Protection Tools 23
- Optimizing Internet Performance 15
- Device and Software Management 17
- Wi-Fi and Home Networks 15
- Data backup 16
- Social Media and Security 16
- Cloud Technologies and Storage 18
- Internet of Things (IoT) Devices 14
- Linux 16
- Mobile security 15
- Setting up home networks 14
- Digital Legacy 14
- IT Education 15
- Cyber threats 17
- File sharing and security 15
- The future of technology 14